


Conclusion
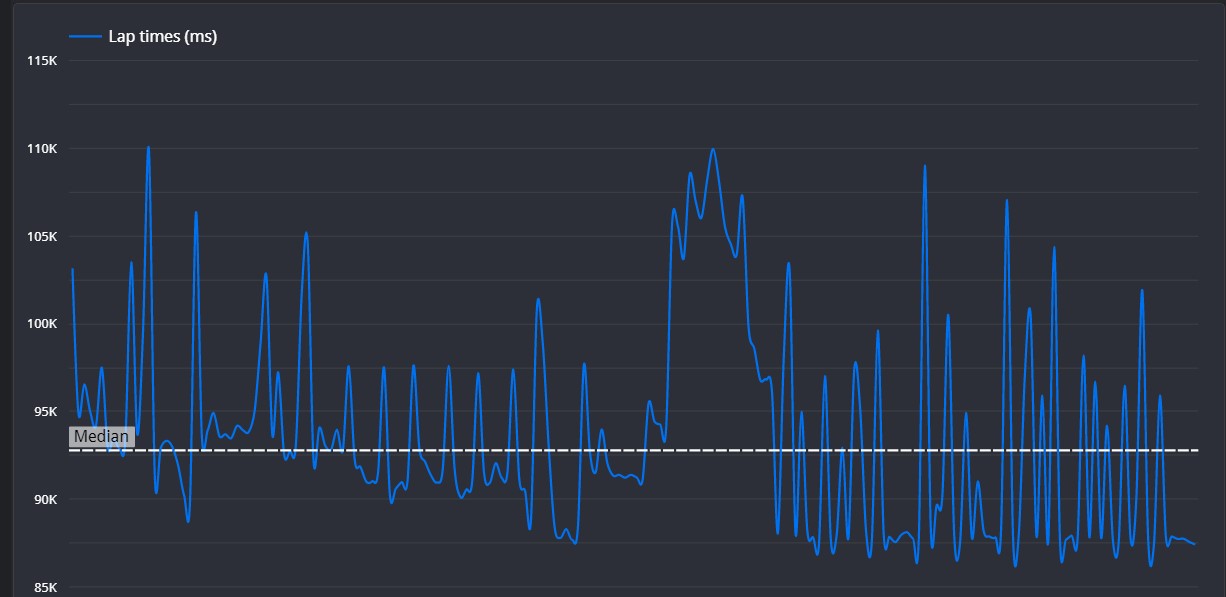
Overall, this is a really clean lap. There are some brilliant lines and some great acceleration zones. However, make sure that you are quick to hit the brakes. This will help shorten the braking zones and let you carry your speed for slightly longer each time.
Set Up Advice
Silverstone is a high speed track, with lots of space to gain time on the straights, so make sure you're not restricting the time you can gain. Low downforce will be a major help for this track, but keep your ride height low to make sure you can maintain some aerodynamic grip. This low ride height means you need to make sure your suspension is stiff enough to not bottom out on the long straights.
Segment 1
☐ This segment is driven flat out.
Segment 2
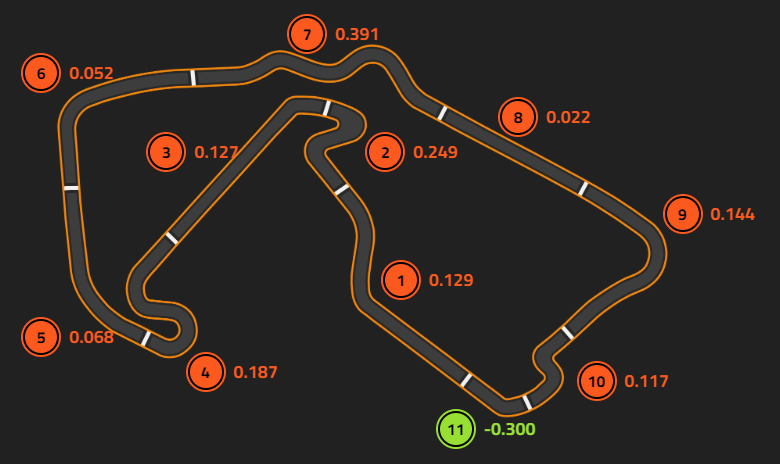
☐ Your braking comes slightly earlier than the reference lap, but you reach full force around the same, so try and be quicker to apply the brakes. You take a wider line initially, but you take a tighter line after the first apex to set yourself up for the second apex. Unfortunately though, you turn too early and it compromises your acceleration. Try to take a wider line for the second apex to maximise straight line speed on exit.
Segment 3
☐ This segment is driven flat out.
Segment 4
☐ This segment is very free form, with various lines being just as quick as each other. You're less than 2 tenths slower than the reference lap through here, so your line is comparable to that of the reference lap. Your braking into Brooklands is very good but slightly early when compared to the reference lap. You have higher speed on the exit of Brooklands, but you brake earlier and turn further for Luffield. This is compensated by you carrying more speed on exit, but your acceleration is comparatively lower overall. Try to smoothen your acceleration to maximise speed on exit, and this is where short-shifting could help.
Segment 5
☐ This segment is driven flat out
Segment 6
☐ This segment is driven very well, there is around half a tenth between you and the reference lap. Your throttle lift is more prominent than the reference lap, but your braking and your line is identical.
Segment 7
☐ After the first apex, you run slightly wide and it means you have to over-slow for the next few corners. Try to focus on the final corner in this complex, and set yourself up the best you can by sacrificing the exits of the corners leading up to it.
Segment 8
☐ This segment is driven flat out.
Segment 9
☐ Your braking is actually smoother than the reference lap, and you hold your own on corner entry. However, you have taken a slightly wider line on the way in, so you need to slow slightly more to get to the apex. This also hinders you on exit, because you haven't been able to carry your speed all the way through the corner. Try to focus on carrying speed through the entirety of the corner.
Segment 10
☐ You start braking earlier than the reference lap, but you only reach full force after the reference lap. Focus on hitting 100% quicker, and this will help shorten your braking distances. Your line throughout is practically flawless, but you waver a bit on the throttle and it costs you a little bit of time through the final apex.
Segment 11
☐ This segment is driven flat out
©Track Titan 2026. All rights reserved


