


Conclusion
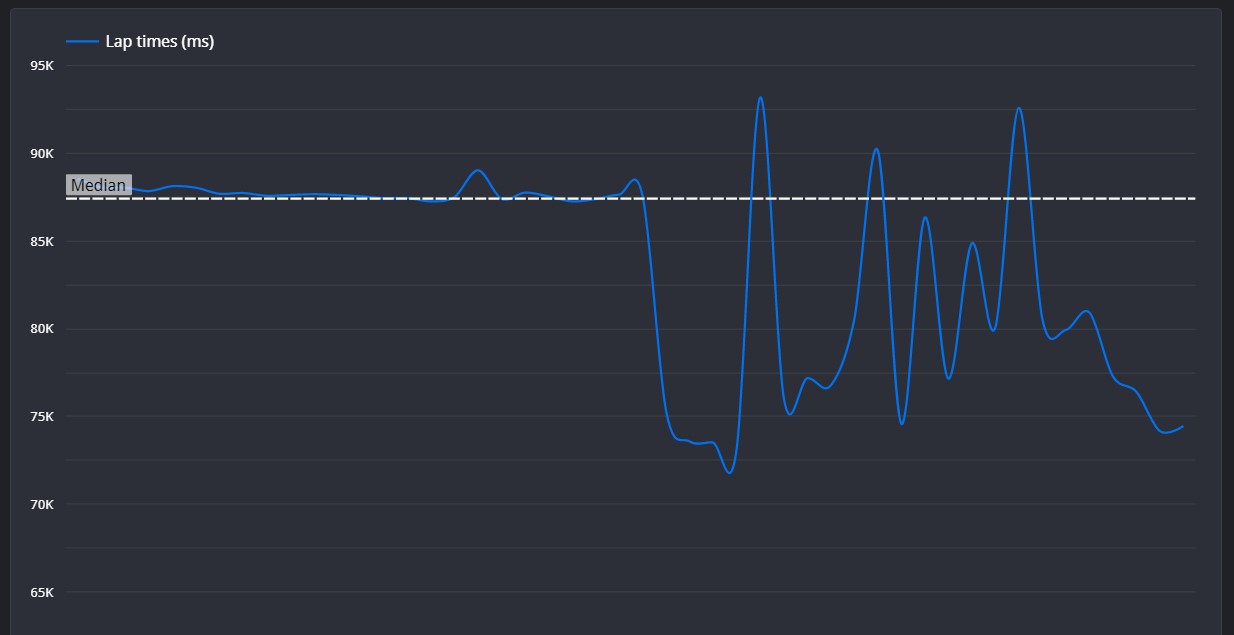
Overall, this is a really clean lap. For the most part, your line is very close or matching the reference lap, and your braking is very good. Occasionally your acceleration is slightly slow, particularly at Luffield and Vale, so short shifting can help stabilise the car at these points.
Set Up Advice
Silverstone is a high speed track, with lots of space to gain time on the straights, so make sure you're not restricting the time you can gain. Low downforce will be a major help for this track, but keep your ride height low to make sure you can maintain some aerodynamic grip. This low ride height means you need to make sure your suspension is stiff enough to not bottom out on the long straights.
Segment 1
☐ This segment is driven flat out.
Segment 2
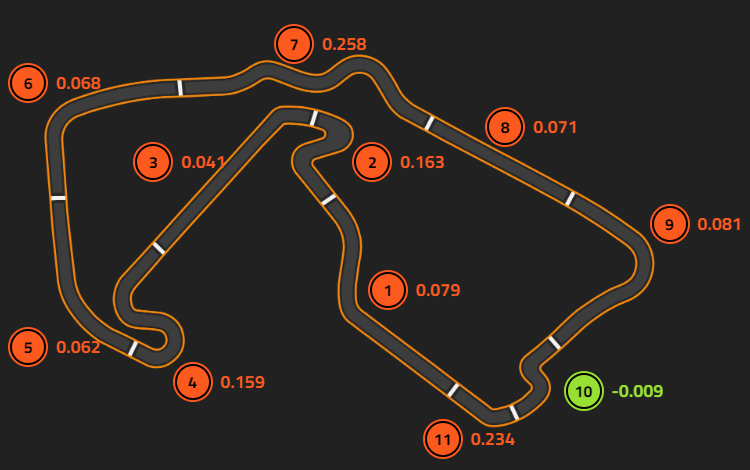
☐ Overall, your throttle and braking is very good here, but on both you can afford to spend slightly more time accelerating to help you carry more speed. Your line is very good through the first apex, but you take a tighter line on exit to help set yourself up for the seconds apex. This isn't always necessary here, and you do lose a bit of time to the reference lap on the exit of this first apex, so aim to carry more speed out of the corner to carry the speed from the first segment.
Segment 3
☐ This segment is driven flat out, but you could afford to take a tighter line to minimise the distance you have to travel
Segment 4
☐ This segment is very free form, with various lines being just as quick as each other. You are less than 2 tenths away from the reference lap, so you have driven this segment very well. Your braking and line for Brooklands is almost identical to the reference lap, and you actually have a higher apex and exit speed, but your line for Luffield is wider than the reference lap. This forces you to slow down more than necessary, but your acceleration doesn't quite match the reference lap, so you can't gain back the time you lost. The reference lap uses gear 5, whereas you're in gear 3, making it much harder to accelerate as smoothly. For the exit here, short shifting can be a real help.
Segment 5
☐ This segment is driven flat out
Segment 6
☐ This segment is driven very well, there is around half a tenth between you and the reference lap. You lift off the throttle for longer than the reference lap, but your peak lift is not quite as harsh. This is because there is a tiny tap of the brakes from the reference lap, whereas you never touch the brakes at all. A small amount of braking could help rotate the car just enough to minimise how much of a lift you need to do.
Segment 7
☐ It seems that you run ever so slightly wider than the reference lap on the exit of each corner, and it affects your run into the following corner. Aim to sacrifice the exit of each apex to maximise your run into the next corner, particularly prioritising the final apex to maximise speed down the long Hangar Straight.
Segment 8
☐ This segment is driven flat out.
Segment 9
☐ Your braking is actually better than the reference here, and your wider entry line sets you up for a really good exit. However, you start accelerating slightly too early which means you take longer to reach full force , so you end up losing time overall. Aim to accelerate smoothly out here.
Segment 10
☐ This segment is actually quicker than the reference lap, but your exit could do with a small change. Your first apex is flawless, however your line is slightly too shallow for the next corner, and you lift off slightly too late, meaning that you take much longer to reach full force. Aim to lift off in time to help rotate the car for the second apex.
Segment 11
☐ This segment is driven flat out
©Track Titan 2026. All rights reserved


