


Conclusion
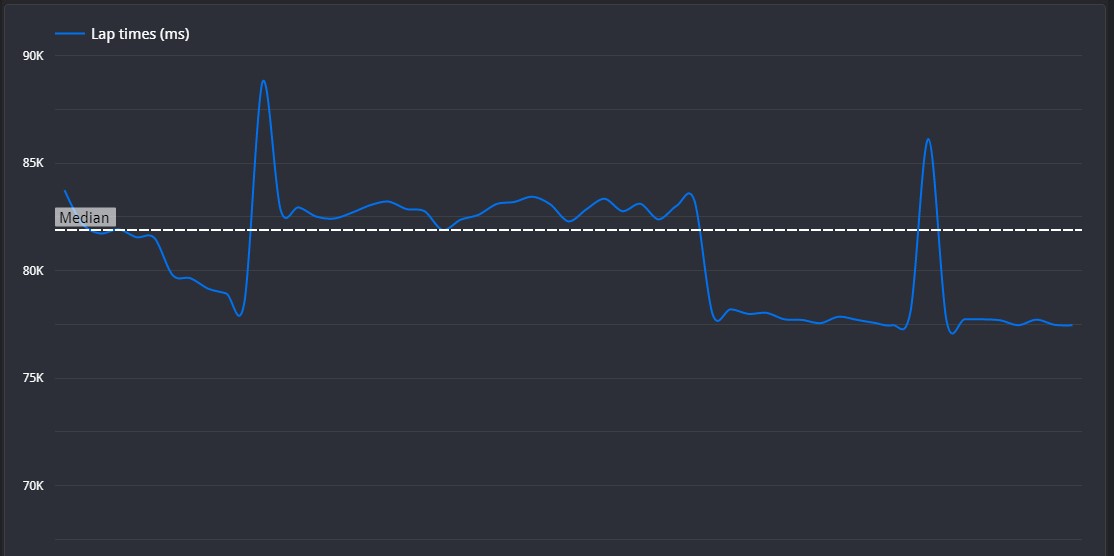
Your lines, and for the most part your braking, is really impressive. On corner entry, your car positioning is excellent, and it sets you up nicely for some good corners. However, there is a tendency to brake slightly too early and accelerate slightly aggressively. Be sure that your car is comfortable on the limit of grip, and you can do this by slowly building your confidence in each section. Start braking and/or accelerating later.
Set Up Advice
Since the circuit received an overhaul, there is much more emphasis on top speed rather than downforce, however the track still has some twisty complicated parts to it. Be sure to maximise speed on the straights, but let your suspension be soft enough to guide you round the corners regardless.
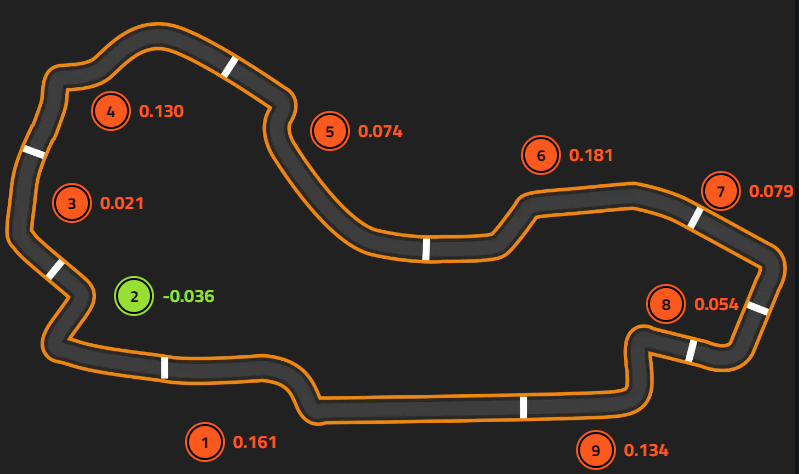
Segment 1 - "Aughtie Drive, T1, T2"
☐ Your line, when compared to the reference lap, is identical through the first apex. Your braking comes slightly earlier but never actually reaches full force, however this seems to work well for you as your speed at apex is higher. You don't hold the car on the second apex for maybe as long as you should, and this loses you a bit of time down the following straight.
Segment 2 - "T3, T4"
☐ Your line on entry is again spot on, and you braking is again ever so slightly early. The rest of your brake trace is excellent though, and you are able to take a tighter line than the reference lap. However, this is at the expense of your line into the next apex, where you're limited to sticking to the inside line. The added throttle lift isn't enough to lose time though, and this segment is quicker than the reference lap. Nicely driven.
Segment 3 - "T5"
☐ This segment is driven flat out.
Segment 4 - "T6, T7, T8"
☐ Your line is good and your braking comes at practically the same time once again, but your brake force doesn't reach 100%. This means that when you go to accelerate again, it's too soon to increase speed, so you lift slightly, and this lift costs you time down the following straight. Make sure that your car is comfortably slow enough before accelerating again.
Segment 5 - "Lakeside Drive"
☐ This segment is driven flat out.
Segment 6 - "T9, T10"
☐ Your line is again excellent, but your braking is early and not as hard as the reference lap. This means that the time spent braking can be reduced. Your line through the first apex is still identical to the reference lap, but you stay tighter on the exit, looking to set up for the following straight. However, you release the throttle through the second apex. Ideally, you should be able to take this apex flat out, and this will help slingshot you onto the following straight.
Segment 7 - "T11"
☐ Throughout this corner, your line is excellent, and this time your braking is the same as the reference lap. However, you start bleeding off the brakes later, and it causes you to slightly over-slow the car before the apex. Your acceleration is very good, but it can't quite make up for the time lost by slowing too much.
Segment 8 - "T12"
☐ You have much more braking here than the reference lap, and it causes you to lose too much speed in comparison. Due to the nature of this corner, try to sacrifice acceleration on exit in favour of speed on entry. You can roll the car into the apex with higher entry speed, and use the corner itself to help you slow down.
Segment 9 - "T13, T14"
☐ This segment is driven very well, with the line and braking being excellent again. The only real piece of advice I can give is to not accelerate too hard on your way into the final corner. Try to focus on your exit rather than your entry, and I see that the acceleration you made before the final corner actually gives you understeer through the apex, hindering your exit. Focus on being smooth, and it will help massively with speed down the straight and onto the next lap.
©Track Titan 2026. All rights reserved


