


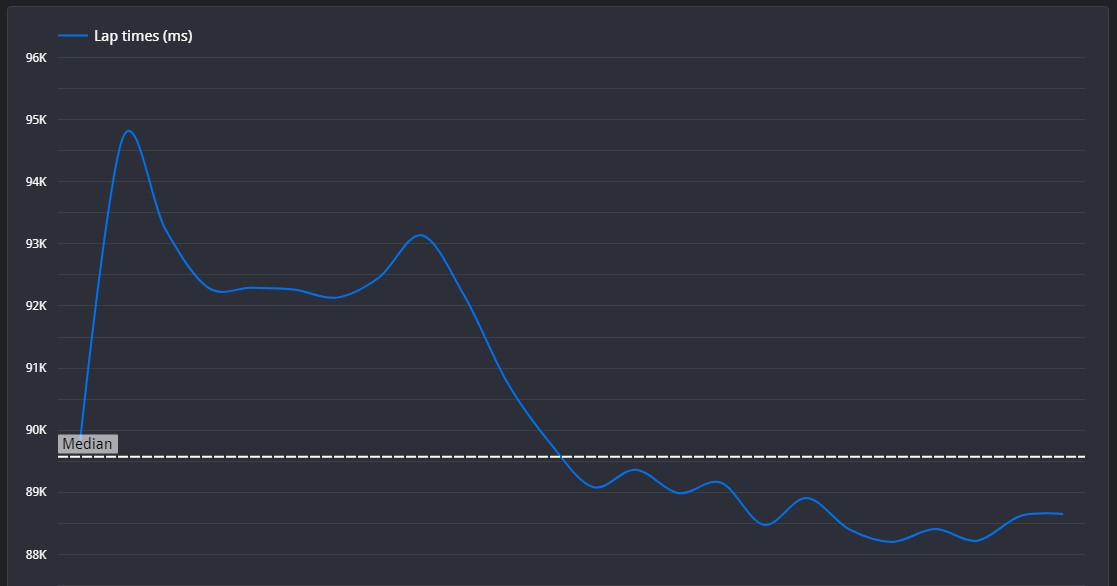
This is a very impressive lap, and is less than a second away from the reference lap. It's mainly just slight differences in your lines, however there are a few places where the braking can also be altered slightly.
Silverstone is a high speed circuit, which puts the focus on having good straight line speed. But, due to the many long turns, you also need to make sure your car can still grip. This means moderately low anti-roll bars and fairly low aero.
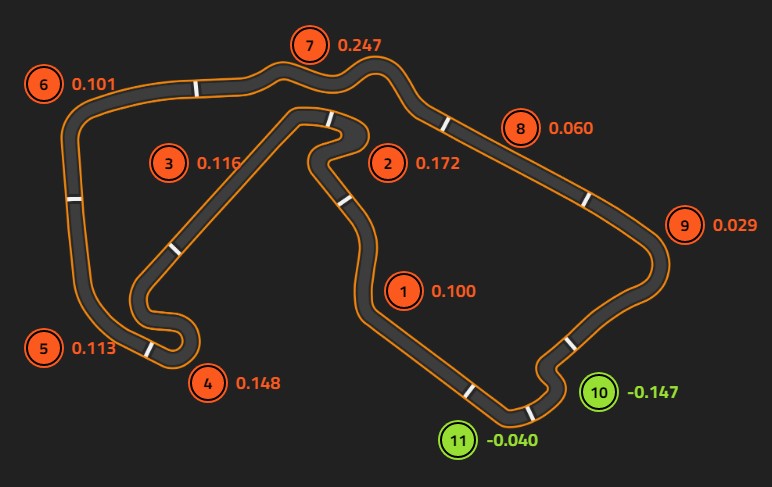
☐ There is very little for me to judge here, you take a good line and keep at full throttle. Nicely driven
☐ You release the brakes a little earlier than the reference lap, and it means that you carry slightly more speed into Village, and you run wider on exit. Unfortunately this means that you're not on a comfortable line to switch sides and line yourself up for the Loop. Try to hold the brakes a little longer to better set up your line for the Loop. Your acceleration on exit is really nicely done, however you do run a little wide on exit, so make sure that this doesn't hinder your drive onto the Wellington straight.
☐ There are a couple of instances where your throttle blips by about 2%, so make sure that your pedals can consistently hold at 100%. Other than that, nicely driven.
☐ Here is the first instance of major trail braking. Brooklands really relies on a strong trail braking technique. You seem to execute this really well, however you don't hit full braking force even while in a straight line. Even if it's briefly, hitting 100% can really help slow you down, meaning that you can afford to brake slightly later. Your bleed off is done really well and it doesn't seem like you get any understeer at all. Your line is almost perfect, although you run noticeably wider on exit which possibly makes the entry of Luffield harder for yourself. I notice that you do have to brake slightly more than the reference lap, which indicates that your wider line did compromise your entry here. You also have a small instance of lifting off on the very exit of a corner. Your acceleration up until that point was very good, so make sure you keep you acceleration consistent all the way to corner exit.
☐ Because this corner is flat, you can afford to hug the inside kerb for as long as possible, no need to take a late apex. Other than that, driven very well.
☐ We see that your line on exit isn't quite extending to the outside kerb. This means that you lifted a bit too much, and you had too much grip at the exit. You can afford to lift less here, and the reference lap does this, not lifting to less than 50% throttle at apex.
☐ Through the first two corners of this complex, your line is identical to the reference lap, driven very well. You have slightly more of a lift for the second apex, but you miss the third apex slightly and run a bit wide. This will compromise your entry into the second to last corner, and mean that you carry less speed through it and onto the hanger straight. Try your best to focus your efforts on this specific corner, as you need to carry as much speed as possible through here to maximise speed for the Hangar Straight.
☐ Driven very well, but I notice a few lift of the throttle towards the end of this segment. Make sure your throttle can hold steady at 100%.
☐ Your line, throttle, and braking is all very nicely done here. There is a possibility to brake and then accelerate slightly later, this will mean that you can extend the Hangar straight ever so slightly, and will also mean you can get to 100% throttle quicker without understeering wide. You can also include trail braking here, because of how long the corner is.
☐ Again, you drive this segment very well, and you are actually slightly faster than the reference time. The only thing I will point out is that I can see you shifted down to 2nd gear, before shifting back up to 3rd before the apex. This could cause a bit of understeer, so make sure you know what gear you need to be in before entering a corner.
☐ Very nicely driven, no adjustments to be made.
©Track Titan 2026. All rights reserved


