


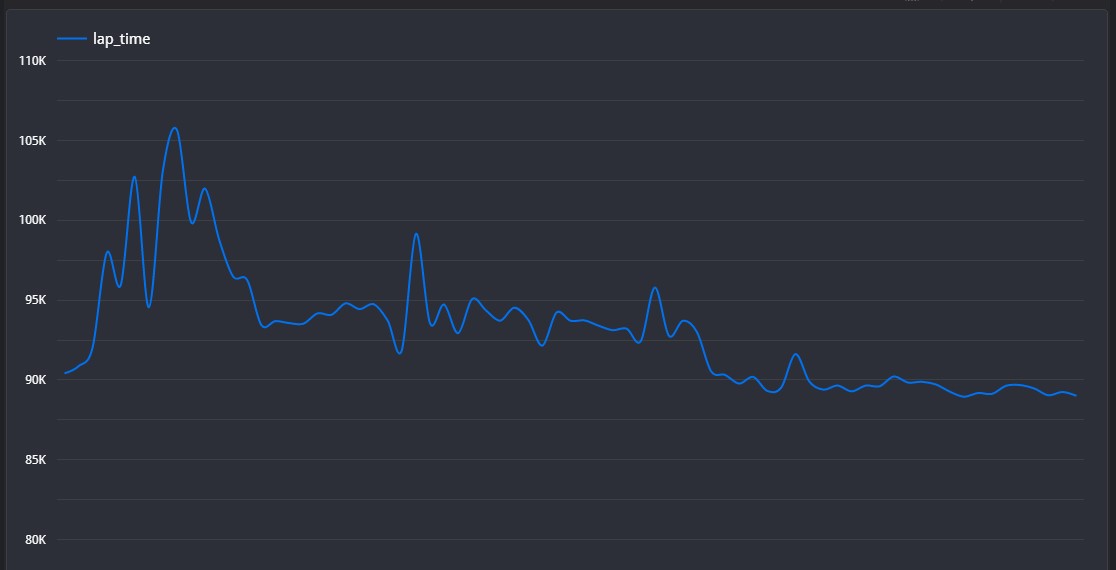
Conclusion
Some nice lines and smooth acceleration. However, there is a tendency to brake slightly too late and understeer past the apex. For a track line this, exit speed is a priority, so work on maximising the exit of each and every section.
Set Up Advice
This circuit requires a unique blend of downforce and top speed. Usually cars would tend to lean towards cornering here, so having fairly high aero and soft suspension can help. Also make sure that you have the right front ride height compared to the rear. This is called rake; the lower the front is compared to the rear, the higher the rake.
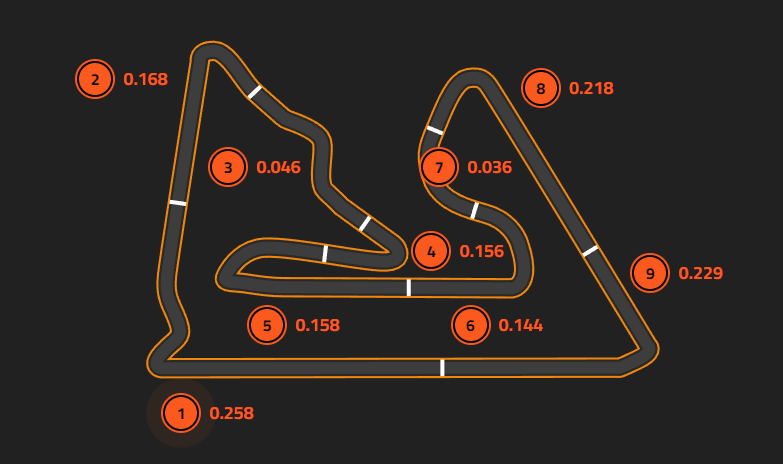
Segment 1 - "T1, T2, T3"
☐ Your line on the entry is still ever so slightly shallow, however your braking is practically perfect. Your throttle release comes before you start braking, and this means there's a very small break between when you're accelerating and when you're braking. Try to have a seamless transition. Your throttle application is great, but you are a tiny bit wide when you start, and it means that you have to lift more for turn 2
Segment 2 - "T4"
☐ Your braking here comes much later than the reference lap, but you take a much shallower line on the way in. Your line takes you past the apex before you reach your minimum speed, which is a lot of understeer, so try to make sure you don't drive so far past the apex. Brake earlier and make sure your throttle is a smooth application to help extend the track on exit.
Segment 3 - "T5, T6, T7"
☐ This segment is again nicely driven, however similar to last time, you apex a bit too early for turn 6, and it means that your throttle is slightly delayed. Try to make sure you enter the turn wider so that you can maintain speed and accelerate better down the hill.
Segment 4 - "T8"
☐ This time, you got the car over to the left in very good time, helping you brake at a better point than last session. However, you start turning very early, so you are still taking a shallow line into the apex. This means you understeer wide and your acceleration is compromised. Try to hold the car on the left hand side until you can turn and hit the apex in one fluid move.
Segment 5 - "T9, T10"
☐ Similar to last time, your braking and acceleration is very good, but your line on the first apex is still very shallow. Try to avoid hitting the first apex to straighten your braking for the second apex. This will make it more efficient and give you a wider line for the second apex.
Segment 6 - "T11"
☐ For this corner, your entry line is very good, and your braking comes at an excellent time. However, you release the brakes very suddenly, and it actually causes a bit of understeer and it pushes you wide. This means that you can't accelerate soon enough, so make sure that you prioritise the acceleration
Segment 7 - "T12"
☐ This corner is flat out.
Segment 8 - "T13"
☐ Your entry speed here is higher than the reference lap, but you brake later, leading to you understeering wide as the corner begins to tighten. This means that your acceleration is delayed, so make sure you prioritise exit speed over entry speed.
Segment 9 - "T14"
☐ Your line is again very good on entry, but you've braked slightly late. This means that you have to hold the brakes for longer on the way into the corner, over-slowing the car and forcing the acceleration much later again. Seeing as the next section is a long straight, try to really maximise exit speed here
©Track Titan 2026. All rights reserved


