


Conclusion
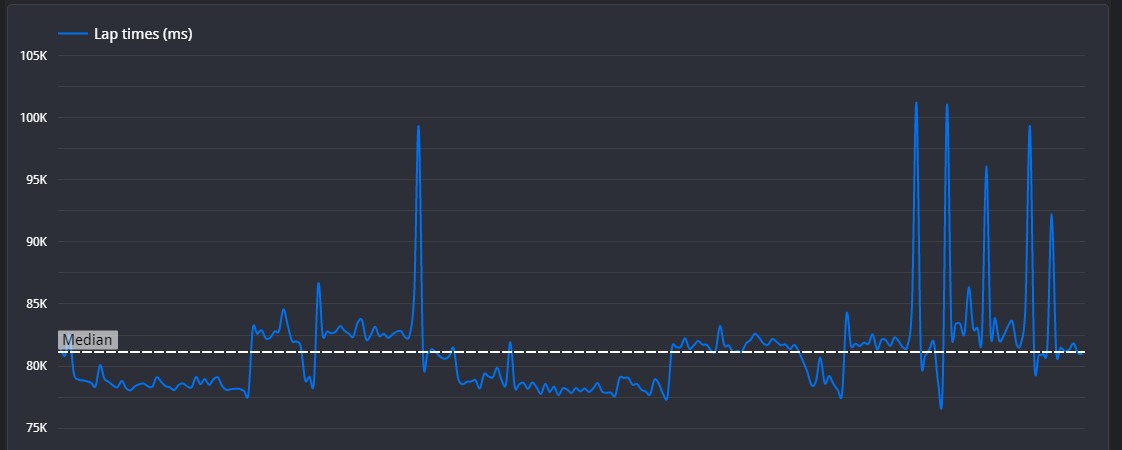
There is some very solid driving here. There are a few moments of tentativeness, particularly under acceleration or braking slightly early, but practice will always help build confidence. Very well driven overall.
Set Up Advice
I saw a few instances where it seemed like you were lacking in downforce, particularly in section 9 and the start/finish straight. This can be helped by simply raising the wings, or by adding a bigger offset between the front and rear ride heights.
Segment 1
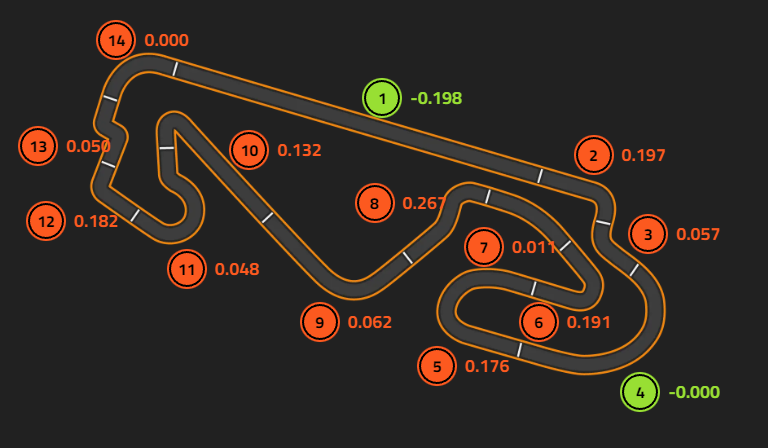
☐ This section is straight and taken flat.
Segment 2
☐ Your line into turn 1 is good, holding the car right to the outside, however you actually brake earlier than the reference lap. This means that you have the option to take a tighter line and turn more for turn 2, but for a complex like this, it actually isn't quicker. You can afford to brake later to maximise speed into the corner, and this will help preserve the speed you built up over the long straight.
Segment 3
☐ Your acceleration seems slightly delayed compared to the reference lap, but this is otherwise very well driven.
Segment 4
☐ This section is driven flat, and you've matched the reference time. You can maybe afford to take a slightly tighter line, but it won't gain masses of time.
Segment 5
☐ You have braked harder initially, but the reference lap has held the brakes for longer. This will actually help them turn into the corner, as the weight is over the front wheels, giving more grip. This means that although your lines are identical at the apex, you understeer slightly wider, meaning that you have to delay your acceleration compared to the reference lap. Try holding the brakes for slightly longer to help straighten your exit.
Segment 6
☐ This is a very well driven corner, with the braking and entry line being done nicely. The braking is slightly less smooth than the reference lap, and this could induce understeer at times. However, there is a slight hesitation during your acceleration, so simply building the confidence to accelerate early will be enough to bring this corner up to speed.
Segment 7
☐ This section is driven flat.
Segment 8
☐ You brake more aggressively than the reference lap, leading to you actually over-slowing the car. You can afford to carry more speed and use more exit kerb. Your throttle application though is very good.
Segment 9
☐ In terms of line, this corner is almost identical. I notice though that you make a slight lift, while the reference lap can stay flat. I can see this being contributed to the setup more than you, so your driving here is very good.
Segment 10
☐ Barring some slightly early braking from you, this corner is driven almost identical to the reference lap. I do however see a small hesitation on the throttle application, so building confidence with the accelerator can reduce the time loss here.
Segment 11
☐ This corner is again driven very well, however you take a narrower line than the reference lap. This can work in your favour though, providing you get smooth acceleration. This again links back to building confidence on the throttle.
Segment 12
☐ Your line is again very close to the reference lap, however you actually over-slow the car here and it causes you to lose speed compared to the reference lap. Ideally, you can trail brake into this section to preserve as much speed as possible.
Segment 13
☐ Your line and braking is very good, however you run slightly wider than the reference lap after the first apex. It's important to maximise exit speed here because of the long straight this feeds you onto, so make sure you do everything you can to accelerate early out of the second apex.
Segment 14
☐ This section is flat and driven very well.
©Track Titan 2026. All rights reserved


