


Conclusion
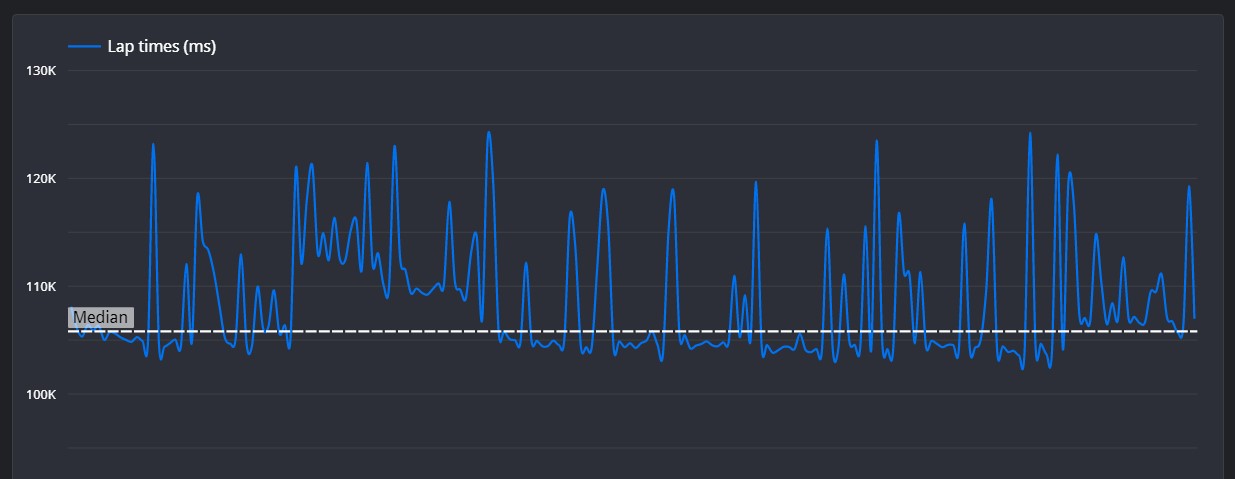
This is a very nicely driven lap. There are very few places where you lose time, only small deviations from the reference lap, and very fixable issues overall. In general, braking seems to come slightly early and your bleed off could be a bit quicker in places, but you've done very well here.
Set Up Advice
Your setup looks to be very well put together, and leaves nothing to be desired. Well done.
Segment 1
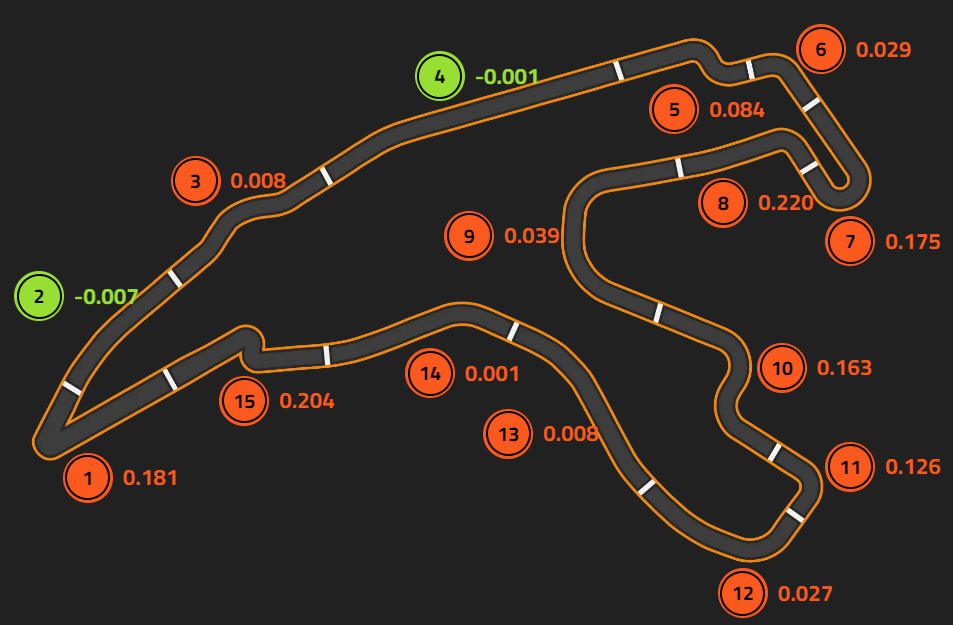
☐ To start the lap, your positioning is perfect. You brake slightly sooner than you need to, which means you exit speed it ever so slightly lower, which loses you most of your time. You opt to take a slightly wider line here in order to get a better exit, and acceleration is impressive, meaning you gain back some of the time. The only things I would recommend you to do would be to brake slightly later and maybe extend the track slightly more on exit.
Segment 2
☐ This segment is driven flat out.
Segment 3
☐ This segment is driven flat out
Segment 4
☐ This segment is driven flat out.
Segment 5
☐ You begin this complex actually ahead of the reference lap. Your braking point is perfect and your line throughout is spot on. However, you release the brakes slightly slower than the reference lap, slowing you down slightly more, and this is where your time is lost. Additionally, on the transition between the first two apexes, you accelerate much earlier than the reference lap, which must have begun pushing you away from your line. You end up lifting off earlier than the reference lap, who accelerated later and more than you did. This is another point where you lose a bit of time, so make sure you don't accelerate too early or too little.
Segment 6
☐ The reference lap takes a slightly tighter line, and as a result they lift for much less time, so they gain on you again here.
Segment 7
☐ Despite the slightly lower entry speed, you brake earlier than the reference lap, and this costs you a lot of speed on the entry, resulting in about a tenth lost. Also, you take a much wider line on the entry to the corner, costing a small amount more time until your acceleration can get some time back. However, it would still be quicker to hold the inside kerb here overall.
Segment 8
☐ Your throttle lift off comes earlier than the reference lap's, however the trace is almost identical. You brake more though, which costs you time on entry and mitigates the run you got out of the hairpin before.
Segment 9
☐ This corner is almost on par with the reference lap. The only small difference is that you start accelerating slightly sooner, leading to you getting a tiny amount of understeer, putting you off line just enough for the reference lap to gain around half a tenth.
Segment 10
☐ Overall, the reference lap is much more aggressive on the kerbs here, able to take the corners much tighter. The braking on the way in is almost identical, and with the same line as the reference lap, you will be able to match the average speed through this segment.
Segment 11
☐ To begin, your line is slightly shallower than the reference lap on the way in, giving you less space to turn and carry speed. That being said, you do brake later, and it seems to work nicely until you hold the brakes for a fraction too long. This slows you down more than the reference lap, allowing them to gain time over you. Make sure to focus on the exit here, as there is no lift until the bus stop chicane a few kilometres down the road.
Segment 12
☐ The time loss here is a result of the slightly slower exit from the previous corner. Otherwise, this segment is driven flat out.
Segment 13
☐ This segment is driven flat out.
Segment 14
☐ This segment is driven flat out
Segment 15
☐ The part where you lose time is the very exit of the final corner, however with this being a chicane, the reason can be traced all the way back to the turn in of the first apex. Your braking starts marginally earlier than the reference lap, but the bleed off is done very nicely. Your turn in however comes slightly earlier, leading to a wider exit to the first apex. A wider exit of the first apex means a shallower entry for the next apex, and this means that you don't quite have enough space to turn, slowing you down a lot more than the reference lap. Try to delay your turn in for the first apex to keep you car directly in the middle of the road before turning into the final corner. Despite your slower final corner, your acceleration is really well done.
©Track Titan 2026. All rights reserved


