


Conclusion
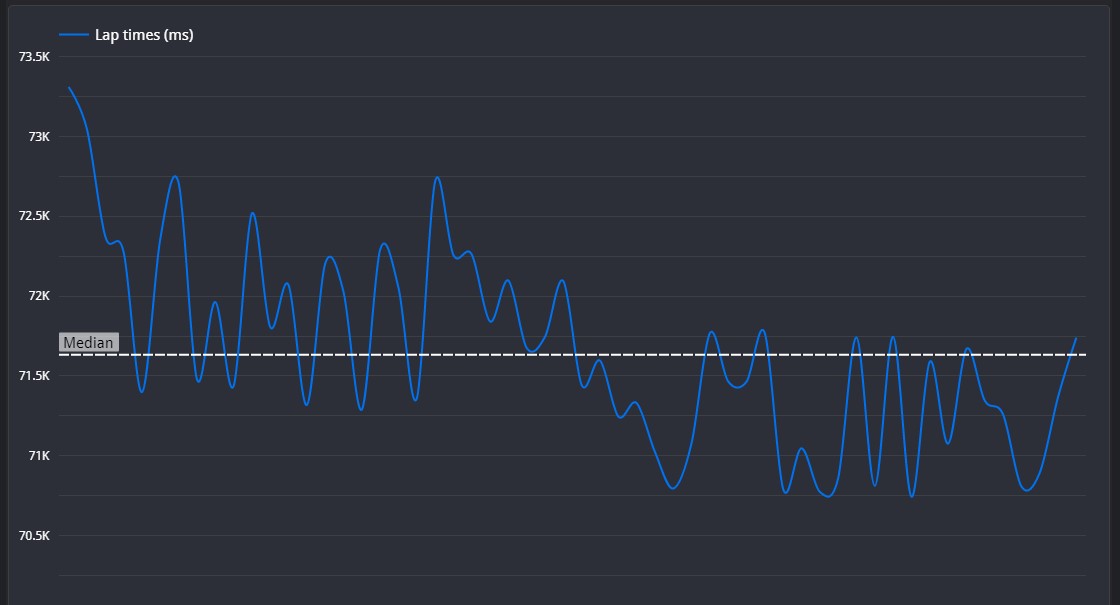
There are some fantastic lines on show here, but you seem to hold the brakes slightly too much on the way into corners, risking understeer. Make sure that you can get most of your braking done in a straight line to limit this risk. It will also help you to be more consistent on a lap-by-lap basis.
Set Up Advice
For Montreal, a high downforce setup can help through all the turns of the first two sectors. Make sure that you sacrifice as little top speed as you can to prepare for the long straight. This usually means medium downforce but soft suspension.
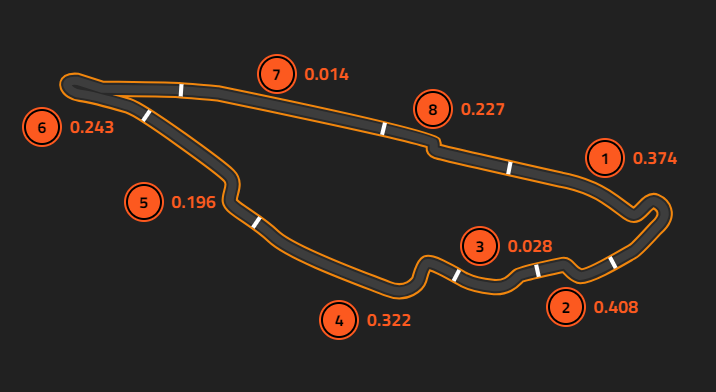
☐ Your line on corner entry is almost identical to the reference lap, and your braking happens at the same point. However, your release of the brakes is slower, which scrubs off much more speed than the reference lap. This means you turn tighter for the first apex and it actually sets you up better to turn in for the long second apex. You gain some time back through the first part of the apex, but then your late braking here means that you understeer slightly more wide, and it means you can't accelerate as well as the reference lap. The focus through this section should be about carrying speed through the first apex, and then having a relatively straight line to accelerate away from the second apex.
☐ You have placed the car nicely on the entry to these corners, but your braking is much more severe than the reference lap, which slows you down much more than necessary. Your apex speed is about 20mph slower than the reference lap, so make sure that you only have a small brake before guiding the car smoothly from apex to apex. You can afford to take a shallower line through both apexes, and make sure you extend the track all the way to the wall on exit.
☐ This section is driven flat out, but you can afford to take a tighter line here.
☐ You brake very nicely here, your trace looks almost identical to the reference lap. You can ride the kerbs a lot for this first apex, and the reference lap does this to help rotate the car, meaning they can brake later. Try and carry slightly more speed in, but use the inside kerb to help turn the car. The second apex is driven nicely, but you appear to be more tentative on the throttle. Try and work on building the confidence here.
☐ Your line for this chicane is very similar to the reference lap, however your braking comes a little later. This unfortunately means that you're still braking slightly as you turn in, and this could cause you to lose grip and understeer. Your line is ever so slightly wider, and I can also see a small blip of the throttle before the first apex, which will also mean you need to slow down more. This all means that your acceleration out of the chicane is delayed, and you exit slower, so make sure that there is no opportunity for your car to understeer.
☐ There are a few lines for this corner, but usually the quickest and most reliable is to take the full inside line. You have opted to take the wider line, but this has costed you in terms of your acceleration. Make sure that your line is as straight as it can be while accelerating.
☐ This segment is flat out.
☐ Again, your line here is practically identical to the reference lap, but your braking extends further past the turn in point. This will mean that you need to scrub off even more speed to avoid understeering at all, so make sure that your braking is done mostly in a straight line before turning in to avoid any risk of understeer. Your acceleration is also a little slow compared to the reference lap, but this can be fixed by simply gaining confidence on the throttle.
©Track Titan 2026. All rights reserved


