


I notice a tendency to release the brakes quickly, which causes a few instances of understeer, particularly for hairpins. However, I also see some great lines and some great braking zones as well. Overall, a very solid lap, but there is definitely some time to gain judging by the potential lap time.
Bahrain has a few long straights, so it's important not to lose too much time here. However, with some hard braking zones as well, it's also important to allow the maximum grip here as well. Finding the right balance is essential. This means fairly low downforce, but also fairly firm suspension to allow for hard braking.
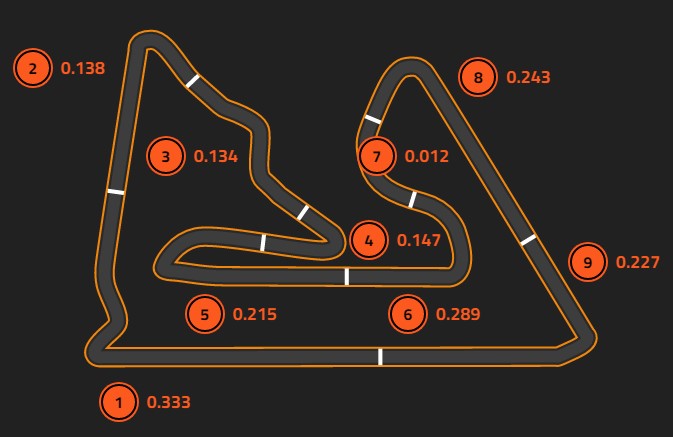
☐ Beginning the lap, your initial braking is really impressive, with a very similar trace to the reference lap. However, your release of the brakes is very sudden, and this leads to you not quite slowing enough for the corner. This causes understeer, and means that your line for turn 2 is compromised, and you have to lift off the throttle slightly. The aim for this complex is to sacrifice the exit of turn 1 slightly to set up a smooth acceleration through turn 2, so aim to bleed off the brakes more gradually. This will allow you to extend the braking zone into the corner, helping you slow more and reducing understeer.
☐ Again your braking is done very nicely, but the release is still a bit sudden, again meaning that you haven't slowed fully. I also notice that you try to accelerate before hitting the apex, and this will only push you further wide. Going so wide means that you have to delay your throttle, so you can't get to full throttle as early as the reference lap. Try to ensure that you slow enough for the apex, and only accelerate when you can smoothly get to 100%.
☐ Your entry was again really good, with a nice line, but during the second apex you accelerate early. This creates understeer, pushing you wide and meaning you need to scrub off more speed for the third apex. This delays your throttle input by quite a way compared to the reference lap, so make sure that if you start accelerating, you can keep accelerating and don't need to lift off immediately.
☐ To begin the corner, your line is more shallow than the reference lap, with your brake release again being slightly sudden. This means that you apex speed is higher, but you get more understeer and it pushes you more wide, preventing you from accelerating. For a corner like this, try to maximise the exit as much as you can, so try and do all your braking before you need to turn in. This will help you to straighten the exit more and accelerate sooner.
☐ This section is notoriously difficult, but luckily you've driven it very well. Both braking and throttle traces are comparable, with no obvious faults in either graph. I notice, however, that your line through the first apex sets you up on a shallower line than the reference lap, meaning that you have to turn more for the second apex. Try to make sure that your line is wide enough for turn 9 to set yourself up for the exit of turn 10. The hill makes it particularly hard to brake or turn here.
☐ Your line is almost identical to the reference lap here, however you still get a slight bit of understeer on the apex. This is most likely caused by your braking. This corner favours trail braking, and I've noticed that you release the brakes quite quickly here. This will mean that you hold at full braking for slightly too long, delaying your turn in and meaning you over-slow for the corner. Try to focus on rolling the speed into the apex by releasing the brakes earlier and slower. This will help you to carry more speed into the apex while still being able to slow enough to turn well.
☐ This section is driven flat, and is very well done.
☐ Your line on the approach to the corner is ok, but it's slightly shallower than the reference lap. For a difficult corner like this, try to make sure you're as wide as is possible. Your braking actually comes slightly late here, but the rest of the trace is very similar to the reference lap. Because of the delayed braking though, you still get understeer at the apex, and this also hinders your chance to accelerate. Again, this corner favours trail braking, so try to slowly release the brakes the more you turn into the apex. This will help you to keep scrubbing speed while allowing you to turn.
☐ For this corner, you have matched the reference lap in terms of braking and line on entry. However, I notice that there's a small lift of the throttle just after the apex, and this small correction will lose you a lot of speed on such a long straight. Possibly try to accelerate ever so slightly later, as this will allow a quicker application of the throttle.
©Track Titan 2026. All rights reserved


