


You tend to get on the brakes quite slowly which will be affecting your overall time. Just this change of technique will be a bit win but requires some effort to control any loss of traction. Overall, a very solid lap, but there is definitely some time to gain judging by the potential lap time.
Bahrain has a few long straights, so it's important not to lose too much time here. However, with some hard braking zones as well, it's also important to allow the maximum grip here as well. Finding the right balance is essential. This means fairly low downforce, but also fairly firm suspension to allow for hard braking.
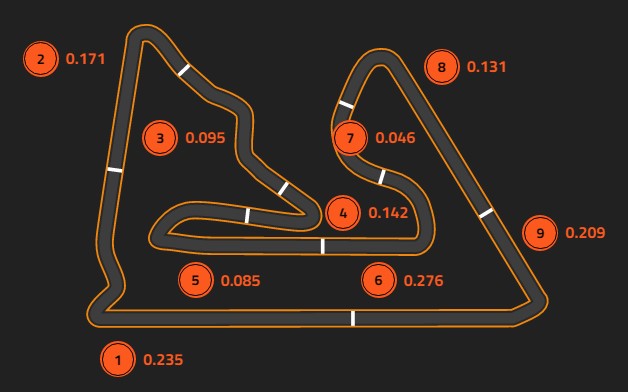
☐ Your braking is good just a little too slow, much aggression required. Great trailbraking into the corner just try to be as smooth as possible on the exit acceleration. The aim for this complex is to sacrifice the exit of turn 1 slightly to set up a smooth acceleration through turn 2.
☐ Similar to Segment 1 but with better acceleration, on this smoother more flowing corner. Interesting that the release of the throttle is also a little slow. It might be worth checking the mechanics of the pedal for stiffness.
☐ Good racing line, smooth braking but you struggled a little with the exit. This could be due to the kerb, therefore try altering your racing line slightly to remove this potential hazard.
☐ Just like T4 a slow throttle release and early braking force a couple of errors. You have a tendency to turn in too early here which is causing you to lose too much speed at the apex. Just 8kph but there is a tenth to be found in this segment.
☐ This section is notoriously difficult, but luckily you've driven it very well. Both braking and throttle traces are comparable, with no obvious faults in either graph. I notice, however, that your line through the first apex sets you up on a shallower line than the reference lap, meaning that you have to turn more for the second apex. Try to make sure that your line is wide enough for turn 9 to set yourself up for the exit of turn 10. The hill makes it particularly hard to brake or turn here.
☐ Your line is similar to the reference lap, you are just wary of the entry kerb. You fail to hit the apex cleanly, possible understeer. This is most likely caused by your braking. This corner favours trail braking which you achieve but you are slow on the brakes initially. You tend to struggle more on complex corners and need to concentrate on your racing line even more so at each stage of the corner.
☐ This section is driven flat, and is very well done. Play with the kerbs a little. It is good practice for the race, just in case you've been pushed wide.
☐ Your line on the approach to the corner is ok, but it's slightly shallower than the reference lap. For a difficult corner like this, try to make sure you're as wide as is possible. Again your biggest practice areas revolve around early use of the brake and a slow release of the throttle.
☐ As you are braking just the little bit earlier again you are also dropping your gears a little early. This is quite noticeable in your Diff to Ref chart as you dip lower quicker and in effect this drops your speed nearly 10kph lower than the reference lap. Get that initial brake point / brake speed sorted and the gearing will fall into place.
©Track Titan 2026. All rights reserved


