


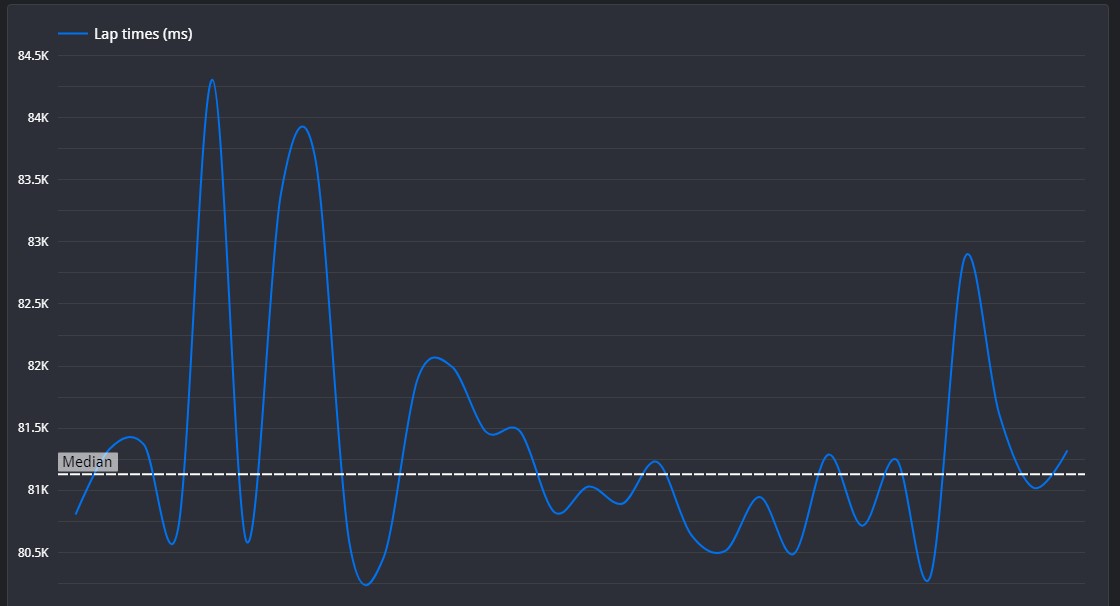
Some very nice braking points and lines on display here. There seems to be a tendency to turn in slightly too early, especially for chicanes. Most places at Monza require you to maximise the exit rather than the entry, so aim to turn in a little bit later overall. This will also help with shortening braking distances.
Monza is naturally a very high speed track, so low downforce is a necessity. Suspension usually verges on the higher end of the scale, as there are very few long corners to need much mechanical grip.
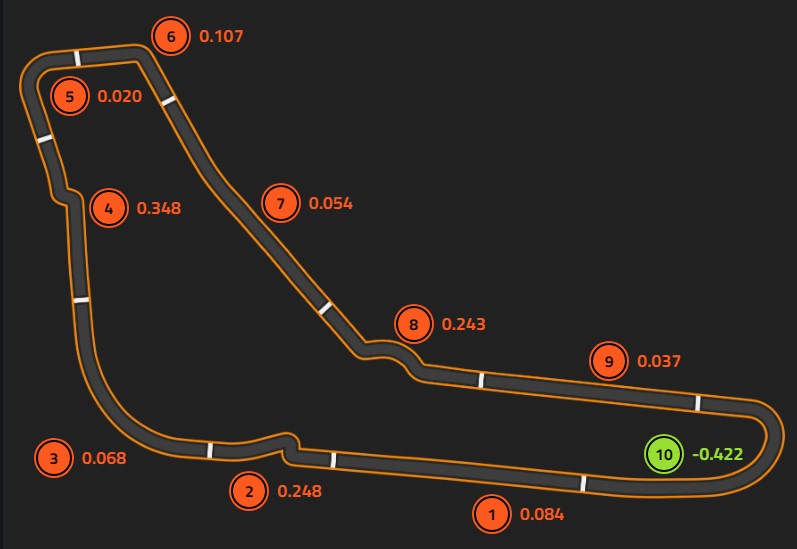
☐ This section is flat, so there's no suggestions I can make.
☐ Your brake application is identical to the reference lap, and you're on a good line on entry. However, you start drifting towards the middle of the road fairly early, and this can actually make it harder to turn in. I notice that after the first apex, you have a small amount of understeer and run slightly wide. This can easily be fixed by braking in a straight line for a slightly longer time. This will allow you to hold the brakes for longer. Also, as this is a chicane, try to maximise your exit rather than the entry, so make sure that you can turn in well for the second apex. Acceleration is good, if a little bit hesitant.
☐ This section is driven nicely. Remember to hug the inside here to set up well for the second chicane.
☐ Again, your braking here is very good, but I notice that your line is not quite as wide as reference lap on the entry. This could make turning in just a little bit harder, because you don't have as much space on the outside to rotate the car. After the first apex, you run a little bit wide, and this means that your acceleration has to start later. For this chicane, it's important to maximise speed on the exit, so try to widen your line for the second apex as much as you possibly can. This will help the acceleration to start earlier.
☐ This section is driven very well. My only suggestion would be that your line on entry is not quite as wide as the reference lap, so try to extend the track as much as you can to help you carry more speed.
☐ Again, driven very nicely. Your throttle though comes very early, and it causes you to lift off slightly to avoid going wide. This lift off causes you to reach 100% later than the reference lap, and will cost you time going down the following straight.
☐ This section is flat, and driven well.
☐ Uniquely here, your braking comes early, and this gives you too much grip to turn with. As a result, it seems like you over-slow and drive the second apex fairly wide. This seems to be your only issue though, as the rest of the complex is driven well. You shouldn't need to lift for the third apex, and you've managed to avoid the lift here.
☐ This section is taken flat.
☐ This is driven very nicely. You're confident on the brakes and your trail braking is executed very well. Your line on exit is a lot tighter than the reference lap, and this could cause a tiny bit more scrubbing, affecting acceleration and tyre wear. Other than that, it seems you've gained time from this section, so nicely done.
©Track Titan 2026. All rights reserved


