


Conclusion
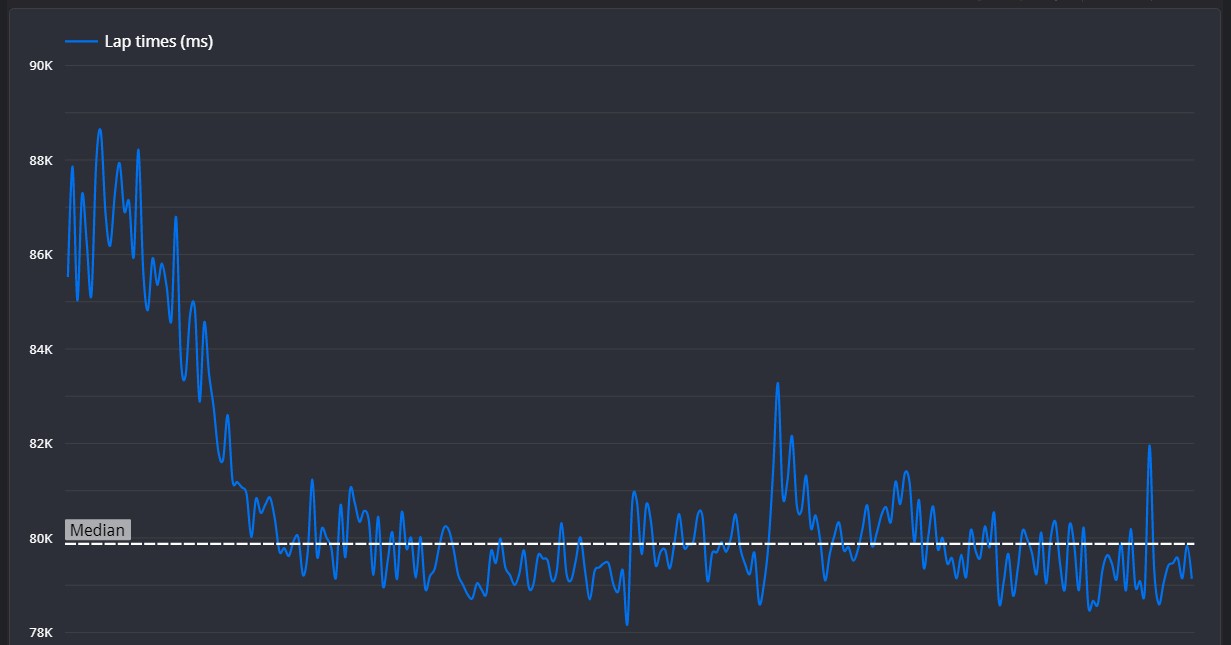
You seem to have a few trends in your driving. Firstly, you brake early and then release very suddenly. I've mentioned this before, but this will unsettle the car, so make sure that your braking has a quick application and a smooth bleed off. Secondly, you seem to have a small blip of the throttle before every apex. This is usually a sign of over-slowing, because the driver feels the need to accelerate to counteract the large amount of grip they have. Fixing your braking should put you on the path to eliminating this too.
Set Up Advice
This is a track that can favour high rake. With a high enough rear to generate grip for the corners, and a low enough wing angle to help with straight line speed, high rake can help with lap times here, so make sure that you set your rear ride height a little bit higher than your front. There is a recommended setup at the top of your lap analysis page, so this may be a good reference point to start from.
Segment 1
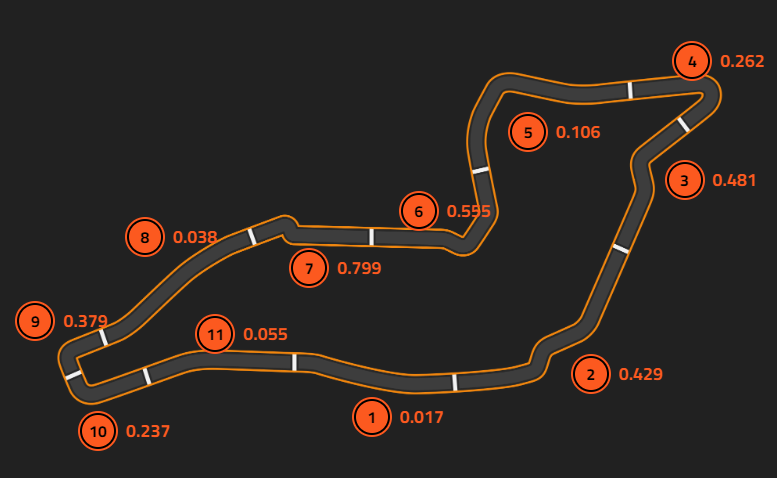
☐ This segment is driven flat out.
Segment 2
☐ Your line on entry is matching that of the reference lap, but your braking begins slightly earlier. This means you approach the first apex slower, however this isn't where most of the time is lost. For the second apex, you lift much more than the reference lap, meaning that you carry less speed through the corner. For this corner, you can afford to take the apex much faster, with almost no lift. The third apex here is not one that you need to worry about, so you can focus solely on the exit of the second apex here.
Segment 3
☐ For this segment, we see an interesting difference. You opt to get all your braking done before the first apex, whereas the reference lap brakes after the first apex and before the second. For a high downforce car, you can afford to brake as late as possible, so braking before the first apex will cost you a lot of time here. Just make sure that, when braking after the first apex, you are as far to the left hand side of the track as possible to help carry speed through the second apex.
Segment 4
☐ I've mentioned before that you tend to brake gradually early, but you also release very suddenly. I can see that again here, as well as a blip of the throttle before you need to start accelerating. All of this means that the car's grip level won't be very consistent during cornering, leaving a lot of time left to gain. In an F1 car, you can afford to brake as quickly as you can, and then gradually bleed off the brakes. Also make sure that you don't start accelerating until you can smoothly reach full force.
Segment 5
☐ Overall, your line is very accurate here and your braking, while slightly early, is also effective here. Your throttle inputs show me that there is still time to gain. You start accelerating early, but this means that you're waiting longer to reach full force. Try accelerating slightly later but more aggressively. This will help you reach 100% sooner.
Segment 6
☐ I will again echo segment 4 here, with your braking and throttle being more inconsistent that they need to be. Luckily, the fix is the same as before, and there doesn't appear to be anything negative about your racing line through here.
Segment 7
☐ I see a similar story with the braking here again, so the fix will be the same. Your throttle is similar to segment 5, so again aim to apply them later but more aggressively. You can afford to take more kerb overall here, and this will help you carry speed into and out of this chicane.
Segment 8
☐ This segment is driven flat out.
Segment 9
☐ One interesting thing I notice here is that for a surprisingly long time, you are at 100% on both the throttle and brake. You can treat both pedals as if they are connected; if you're using one, you can't use the other. This also shows that you can brake later, and this will help preserve speed from the straight before. Your throttle application here is good, but there is still a small blip just before the apex. Try to eliminate this.
Segment 10
☐ Ideally, you shouldn't need to brake for this segment. A lift is usually enough, and the reference lap shows this. Try to make sure that you are not scrubbing off unnecessary speed, especially before a large straight like this.
Segment 11
☐ This segment is driven flat out, but keep the car right up close to the pit wall to minimise the distance you have to travel.
©Track Titan 2026. All rights reserved


