


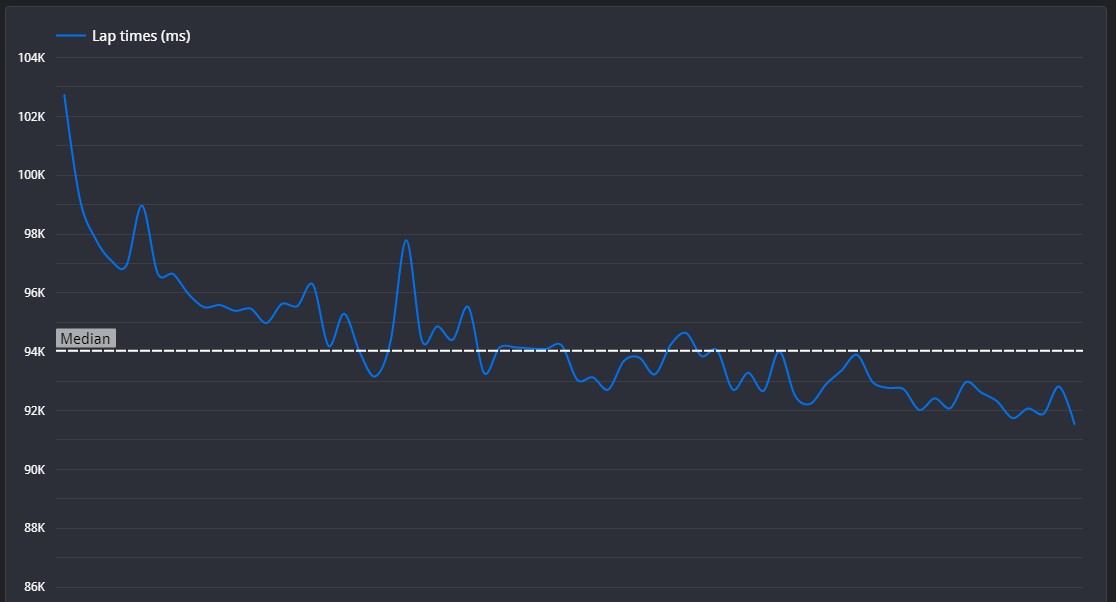
It seems that a lot of the time is lost under braking. Your aim is to try and get quicker on the brakes, as this will help condense you braking zones down more than you have them now.
Set Up Advice
Suzuka is a tricky circuit to find the right setup for. There are a lot of medium speed long corners, meaning that downforce will be medium to high, and antiroll bars can be set fairly low.
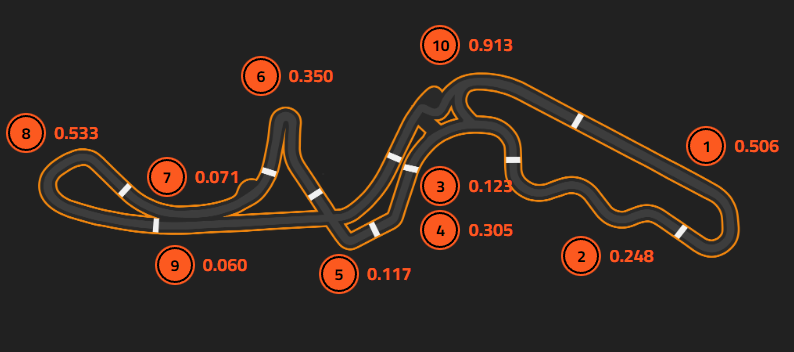
Segment 1
☐ The entry line is good, but you end up braking slightly for the first apex. When driven right, you don't need brake here, as you can slow down enough for the second apex after passing the first. The reference lap here takes a shallower line than you, meaning they can brake in a straighter line, making their entry speed higher. I see a small blip of the throttle before the second apex, and this will actually create understeer. This means that your exit line is wider, and it means that you can't accelerate at the same rate as the reference lap. Try to focus on getting a smooth exit here, to make sure you can accelerate as quickly as possible.
Segment 2
☐ This segment is a complex one, so this may be a long explanation. Your first apex has a little too much of a lift in it, and this could maybe be as a result of your slightly wider line through the corner. Your second apex is spent recovering from that, and it means you can actually accelerate slightly more than the reference lap. Your line through the next 2 apexes is very good, however the reference lap is still able to carry more speed due to them braking slightly, not just relying on lifting. It also means they can accelerate quicker and are on a better line for the next segment.
Segment 3
☐ Due to the reference lap exiting the previous segment in a shallower line, they have a wider entry for this segment. This means that you have to lift off more for the uphill apex. After that, the line is good and you drive well
Segment 4
☐ Your entry line is slightly too shallow, so try and hold on the left hand side of the track before braking and this will help you turn in. You brake slightly early and slightly too much, and it means that the car doesn't naturally find it's way to the outside kerb. The car has more grip to give, so work on braking later and letting the car find the outside kerb by itself.
Segment 5
☐ You drive this segment very well, with the only improvement to be made coming in the braking. You start braking at the right point, but you take a while to reach 100%, and this means you're still braking fully as you try to turn in. This could create understeer, creating a false limit for the grip you have. Try to brake hard initially, before trailing off the brakes the further you turn in
Segment 6
☐ You have set up the car very well for this corner, and you have a nice idea by going wider at the start of the corner. However, try to make sure your throttle can regain the time back on exit. I see a few small hesitations which makes you get to full throttle slower than the reference lap, despite having a straighter line. Try building the confidence on the throttle as much as you can here.
Segment 7
☐ This section is driven flat out but your line is very wide. Try to drive the corner as tight as you can to reduce the distance travelled.
Segment 8
☐ As with segment 4, your line on entry is slightly too narrow and it makes it harder for you to turn in, slowing you more overall. You brake earlier than the reference lap, but also brake harder. This means you have understeer on the way in, slowing you further and allowing for a late apex. Unfortunately this then puts you offline again for the following apex, similarly to the first. Your braking here is much better, but I see a blip of the throttle on your way round the corner. Considering how much the elevation changes on exit, this will have caused some understeer, hindering your ability to accelerate quickly
Segment 9
☐ This segment is flat out and driven well.
Segment 10
☐ You have braked early, but you have reached 100% at the same time as the reference lap. This shows that there is potential to condense your braking zones by braking later and quicker. Your bleed off is good, if a bit sudden, but you're able to get the car turned in for the first apex. After this though, the second apex features a lot of understeer, forcing you wider and wider the further round the turn you go. The reference lap actually does a small tap of the brakes before turning in here, so try this technique next time you drive this combination. This understeer also makes it harder for you to accelerate, so as a result, you can't get up the speed at the same rate as the reference lap.
©Track Titan 2026. All rights reserved


